Showing posts with label cockpit. Show all posts

Monday, May 28, 2018

TYING THINGS UP!

 I got back on the boat the other day to get things ready for launching. I'm in no hurry this year as the spring has been rather wet and cold. Just messing about on the boat is nice since I have a harbor view from the boats location in the boat yard. So when NOAA said the day would be sunny and hot it seemed like a good idea to get down to BIANKA and start doing what needs to be done. When I got down to the boat it was indeed a hot day. Too hot to work in cabin much less down below the cockpit.
What to do except open a cold can of seltzer in the cockpit where there was a hint of a breeze and a little cooler. So some work around the cockpit seemed like the thing to do.
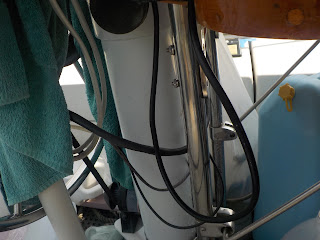
Looking around I noticed some of the wires around BIANKA's helm station looked like they could be tidied up.

They were out of the way enough but. making them a little neater and secure would not hurt. So I took out the newly bought Cable Tie Gun and went to work.

Once those were taken care of I remembered I needed to re secure the Helm Station platforms themselves as the old ty wraps holding them level had broken.  


Using the Tie Wrap Gun I had them re secured, tightened  and level in a few minutes. 


I think I should add a second ty wrap to add some extra holding power in the future. But, for now one should do. Then looking above my head I noticed that the wires for BIANKA's 48 volt solar panels needed to be secured. A few tie wraps slipped between aluminum bars and the job was done


It was a quick and easy job. But, one that helped make things neater and secure. Plus it made me feel somewhat productive on such a hot day.                  
Saturday, June 13, 2015

USEFUL THINGS ON BOARD: PORTABLE WORK TABLE

While I was getting things ready for launching this spring I came across an old cutting board stored away at home. I thought it might be useful on board so I came up with an idea to make it useful as a portable work table. Using some scrap wood from an old bed frame and a couple of screws I soon had a very useful surface to work on around the boat. One place where I could use a work table space is in the aft quarter. Perhaps using the stainless steel pushpit railing for a support. I then thought how I could secure the cutting board from slipping off the rail. That's when I found the old wooden bed frame that already had a strip of wood running along an edge that would be perfect for the function:

After securing it to the cutting board with a few screws it was ready for a test fitting:


Perfect. The wooden lip will prevent the surface from sliding off the rail. I will probably install another strip so the rail fits between the two strips at some point but, this is fine for a start. I then took another piece of the old bed frame and screwed it into a position where it would sit on the cockpit coaming while the other board was sitting on the stern rail:


It tilts down at a slight angle but, not too bad.


While most items would not roll off the work table at this angle having a flat surface would be better. So looking around while putting on my "use what you got hat" I found that two 12 oz aluminum cans sitting on the coaming surface make for a perfectly level work surface:


Problem solved!  I also found another area where this portable work surface comes in very useful. I spent some time varnish the fold down cockpit table on BIANKA. I would prefer not to have to do this too often. I found my new portable cutting board work table fits nicely on top of the fold down table top while protecting the varnish job. It also  provides a handy work table service for projects at the same time:


Plus turning the work surface sideways allows for an even more secure work surface thanks to those edge strips:


I think this portable work table is going to come in very useful on board for a number of projects in various spots around the boat. I will continue to report the new uses for it as they appear.

Tuesday, July 01, 2014

FROM THE USE WHAT YOU GOT FILE: Helm Cover

It feels good to have the boat back on the water. I still have not gone out for a sail I'm still getting things organized and cleaned up and doing some small projects. One of which is a new helm cover  I stripped and varnished the cockpit table recently and wanted to protect it as much as possible. A large helm cover fits the bill.  I've seen helm covers made out of Sunbrella material and I may make one once I get a Sailrite Sewing machine which is on my wish list. Instead I made one out of some recycled shrink wrap material:

It completely covers the helm and the table is pretty durable and the only cost to me was a few brass grommets and some spare line I had lying about to keep the sides secure :

While maybe not as colorful as a custom Sunbrella cover it does the job and helps keep some shrink wrap out of a landfill somewhere.  Plus the price is right.  It can also function as an additional shade cover if one should need it when it's not covering the helm.

Tuesday, July 20, 2010

WHAT THE HELM?: Part 1

Speaking of electric propulsion. My Thoosa 9000 system came with a rather robust industrial quality electric throttle control shown above. Which naturally I proceeded to locate in the area where the previous engine throttle control for the old Westerbeke diesel was located. It was how shall we say a "temporary plan". Which I used for almost two whole seasons as shown below:
This actually worked quite well. I've already expressed my liking for using cable ties on board. The above is just another example of where they came in handy. While my "temporary" installation worked fine for almost two seasons. Aesthetically, of course it would never do. Even though the Thoosa throttle control was pretty robust and weather proof. It is better to try and keep it out of the weather as much as possible. So I went about thinking about a more protected and permanent design. I wanted to have the control at the helm position. I've seen installations where the throttle is located in other areas of the cockpit requiring the helmsman to leave his position to make adjustments to speed and direction of the boat. I think this is a pain at best and dangerous at worst. Especially if a passenger accidentally hits the control. I believe the person controlling the boat should have as many controls as possible within easy reach and without taking his hand off the wheel. The location of the old throttle was the best location for the electric throttle too. I began by removing the the old mechanical metal throttle control from the helm. It was not serving any purpose since the diesel was removed.  This was easily done by removing the  control and the linkage underneath the compass and removing it from the compass binnacle. I also removed the control cable from inside the binnacle too.


I then constructed a helm platform out of 1/2" Starboard. This would provide a sturdy sheltered location for mounting the electronic throttle keeping it out of the weather but still allowing the helmsman to have easy access.


I needed to make sure to allow room  so I did not stress the cables that came out of the control when mounting it:

I used a hole drill bit, jig saw and a Dremel tool to shape the platform around the hand holds and binnacle. Which allowed me to incorporate them into the support of the platform.

I also started thinking of other items I would also like to have located at the helm position and one of them was a 12 volt outlet to provide power for recharging a handheld VHF, Blackberry, Laptop or MP3 player. It would also come in handy for powering a cockpit light when dining or working in the cockpit in the evenings.

 I also added other items to the location which I will get to in a later post.

TO GO TO WHAT THE HELM: PART 2 CLICK HERE