Showing posts with label corrosion. Show all posts

Friday, February 21, 2020

WINTER MAINTENANCE WITH WD-40


It's a nice windless sunny winter's day about 45 degrees Fahrenheit which makes it an
excellent day to head down to the Boatyard and check on BIANKA. No wind makes for
a pleasant day to do a boat check even if it is still winter.
But, even before I climb into the cockpit I needed to do some maintenance at ground level.Toward the end of last season the combination lock I used on the dinghy dock fell into the water for about a week. I rinsed it and initially sprayed WD-40 into it at that time and it continued to work. Over the winter the remaining salt inside had started to ooze out of the lock and was starting to corrode it and make it difficult turn to the right combination


So I reached for the WD-40 and sprayed the lock.


 With some help from an old toothbrush I managed to remove the salt cake residue from the lock. Soon it was almost as good as new and the lock mechanism worked smoothly..


Since I had the can of WD-40 out it was also time to  lubricant the folding joints of the ladder I
use to climb  aboard BIANKA over the winter.

A few sprays of WD-40 on a warm winters day may seem like simple maintenance but, makes for a big improvement in metal items exposed to  the environment over the winter.

Tuesday, April 04, 2017

SPRING CHECK SURPRISES: The Good and the Bad

A nice 60 degree F day in between rain storms. It has be awhile since I've checked on BIANKA about a month. Since that time we've had a near blizzard and some pretty heavy rains. I don't shrink wrap BIANKA for the winter having found the boat when shrink wrapped develops mildew in spots and generally tends to get grimy and feel humid when shrink wrapped. So I was surprised to see despite the snows and rains of the last month BIANKA's bilge was pretty dry except for the splash of antifreeze I left in it during my last visit:


She's a pretty tight boat. I think I helped make her tighter by taping over the cockpit hatches. This prevents excess water, ice and snow from leaking down below. Probably something I should do every year when storing her for the winter.

I just did a quick check and took some photos of a few things that are on the maintenance list. One of the items is the jammed Maceration pump. I'm not looking forward to working on this item for a number of reasons but, mostly because it's location looks like it is going to be a pain to get access to and remove. While taking some photos of the pump area I noticed that one of the clamps that secures the head intake and wash down hoses was severely rusted:


This is a boat sinking issue and it is moved to the top of the list of Spring Outfitting issues to address.

Saturday, September 20, 2014

REMOVING A FROZEN ANCHOR SHACKLE AND SWIVEL

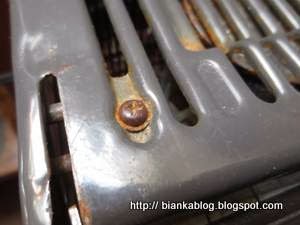
I recently mentioned the anchor swivel's pin that was approaching a "yikes" moment. Since I had a spare on board I looked to replace it. It had been attached for as long as I have owned the boat and normally should have been a five minute replacement job. Except for one thing the pin of the shackle that attached the swivel to the anchor was seized and no amount of PB Blaster, wrenches and even  micro torch supplied heat could move that shackle pin. Looks like that five minute job just got a little longer since I was going to have to cut this shackle off too in order to replace the swivel. But, what to use? It's a tight space around where the anchor and shackle lay. A hacksaw would be awkward to use in the confined space take quite a bit of time even if I had a new blade which I did not. Enter the Dremel 200-1/15 Two-Speed Rotary Tool Kit with a pack of heavy duty cutting disks. I am able to power the Dremel a number of ways on board. One is with my on onboard Honda EU 2000 generator which is really over kill for the power requirements of the Dremel Tool. Another is with the AIMS 1500 Watt 48 volt Inverter I installed last year. Though for most jobs I just use the 200 watt 12 volt Powerstar Inverter that I bought back in the 1980's. It not a pure sinewave inverter but, it powers the Dremel Tool quite nicely for all sorts of quick projects.  The Dremel made short work of cutting through the swivel that was attached to the seized anchor shackle as shown here:

Once the old swivel was out of the way I could start to work on the seized anchor shackle.  I probably should have used a  Dremel 1-1/4-Inch Reinforced Cut-Off Wheel but, even the Dremel 420 Heavy Duty Cut-Off Wheels  I used did the job. Though I did have one or two disks break in the process. They still cut through the swivel and shackel quite easily despite not being reinforced. I was impressed.

After removing the swivel I tackled the stuck shackle pin. Rather try and cut through the crown which would have required two cuts to remove the shackle. I decided to see if I could just cut through the one lug of the shackle where the pin screwed into. Perhaps just cutting away enough of the lug would allow the pin to be removed:

I was careful not to cut into the anchor shank. After a few partial cuts of the shackle lug I was able to easily unscrew the shackle pin:

Which still looked pretty good but, the corrosion that held it in place was pretty tenacious so it needed to be replaced along with the swivel.  I used some  Tef-Gel on the replacement shackle threads to help insure that I will not have to cut the shackle next time I have to remove it:

With the old swivel and anchor shackle replaced I could now sleep easier when BIANKA is at anchor:


Friday, April 11, 2014

RETHINKING PROPANE USE ON BOARD: Dismantling the Stove Part One

When I discovered some nasty corrosion on the twenty seven year old Seaward Hillerange Model 3122 stove I starting looking into repairing it.


 As the cost of the parts to refurbish the stove rose and since it was already over  two decades old.  I began to seriously rethink the use of propane on board. I did an experiment last season using a Coleman single burner unit and one pound propane canisters for all my cooking on board. This worked out well so I abandoned the idea of refurbishing the Hillerange stove altogether.  But, since it is already installed and nicely gimballed I thought I could still use parts of it as a base for my new cooking system.

So now that the winter has finally ended one of my first tasks on board is to start removing some of the corroded components of the stove. After over two decades of cooking and having the cast iron piping and stainless steel metal and screws in contact with one another created some dissimilar metal issues. It looked like it might be tough to remove them.  It seemed to me the prudent thing to do would be to spray the attachment screws and flanges with a generous spray of  PB Blaster   .

 I let this soak for a while and then just to help thinks along took a small wire brush and brushed the screws and flanges areas with it to scrap away whatever rust I could:


This was followed by another soaking of some more PB Blaster onto the scrubbed areas. I'll let these areas soak in for a few days and then come back and try and remove the burners and gas valves. Hopefully, the blaster will have done it's job by then.

Monday, March 24, 2014

UPDATING THE ELECTRIC PADDLE

Well another 50 degree F plus day came along between cold snaps. So I wandered down to the boatyard to check on the boat. I stopped by the office for a gam and Russel was busy sending out bills to drop the moorings. A bittersweet sign that the new sailing season is coming. But, of course so does the bill for the mooring. When I got on board I checked the bilge:

Still dry as a bone and good to see. I let my Dual Pro 4 charger top off the four 8A4D AGM batteries that make up the 48 volt propulsion bank of BIANKA. Though they were pretty much full already. I then turned my attention to a quick little issue regarding the new Electric Paddle outboard I bought. A few weeks ago I got a letter in the mail from the folks who make the Electric Paddle about a possible issue of corrosion on one of the connector terminals because of a missing seal on the connector. A follow up letter provided two brand new seals to be installed in case they were not on my outboards connector:

It turns out they weren't on my outboard's connector but, no harm was done as the connectors were completely clean and corrosion free. Even though the battery and outboard had been exposed to several rainstorms over the season.

After I put one of the seals on the connector I decided to just do a little preventative maintenance as long as I was here. I took one of the Connector Cleaning Brushes  I carry onboard and put some Corrosion Block on it:


Even though the connectors were still very clean and showed no signs of corrosion. Using the Corrosion Block can't hurt so I cleaned inside the plugs and pins of the connectors:


Mission accomplished!  Nice to see that the folks who make the Electric Paddle here in the United States also follow up on the products once they are shipped.

Monday, March 10, 2014

DON'T JUST SIT THERE, DO SOMETHING


The winter has been terrible filled with snow and cold temperatures. So much so that I only got to visit the boat two times since December. While things were OK on the boat. It was still too cold to spend much time on board on projects and spring outfitting. It's too cold for any painting, varnishing, epoxy. Even holding metal tools for any length of time is not fun with temperatures in the mid 20's. Still I try to accomplish something in the short time I do spend on board. For example I noticed that the ENGEL MT25E refrigerator/freezer needs a little attention after ten years of reliable service:


Because of it's location near the hatch it has developed some rust on the compressor case:


My plan is to sand that off and touch it up with some paint. That is when things get warm enough to bring it outside to work on it. But, since it has been so reliable for the past decade I've never had to do any maintenance on the unit. So like the screws on my Honda 2000 generator some the screws on the ENGEL case may have  rusted in place:


So I figured the least I could do during my visit was to spray some   Corrosion Block penetrate onto the screws and letting it go to work:


I'm hoping it will make removing the screws in the future a much easier process once things warm up enough to spend more time on the boat. At least that's the plan. It's just a little thing to do but, gives me the feeling that at least something was accomplished during the winter visit.

Friday, January 24, 2014

ELECTRIC PADDLE MAINTENANCE

I mentioned in my review of the Electric Paddle outboard a few weeks ago that it looked like the only maintenance it needed was to dip the lower unit in some fresh water and let it drain. But, in rethinking that there is one other maintenance procedure that I needed to do. That was to put some Tef-Gel on the motor lock down screws. Which is easy enough to do even on a mid winter check on the boat. The Electric Paddle is light enough and has no potential leaking fluids to worry about so working on it on the cabin table is possible:


It takes on a minute to apply the Tef Gel to the hold down screw threads:


Then some turns of the screws to distribute the lubricant on the threads and you are done. Like the Thoosa 9000 electric propulsion system on BIANKA the Electric Paddle outboard requires  minimal maintenance. Leaving more time for sailing or working on other projects.

Monday, September 17, 2012

RELIABILITY: So much for that!


Reliability can be a double edged sword as I recently found out. I've had a Honda 2000i generator on board for as long as BIANKA has used electric propulsion which is going on five years. It is used for a number of things on board. Because BIANKA no longer has a diesel engine and therefore no alternator the generator comes in useful in assisting the electric windlass in raising the anchor so the 12 volt battery bank is not depleted. It is also useful in charging the 48 volt propulsion bank especially the all important bulk phase for charging before letting the wind and solar take over at anchor or on the mooring. It can also move the boat along nicely at three knots without draining the battery bank as an economical hybrid propulsion system. It also powers some of the 120 volt power tools I sometimes use on board too. For five years the Honda has been a reliable workhorse when needed.

So when I noticed the pull cord was starting to look a little frayed a few weeks ago I bought a replacement. After five years it was to be expected. It was still starting the engine but, I figured it was only a matter of time before I would have to change it. I was about to head out on a two week plus cruise with an extended stay at a dock in New York where I thought I'd replace the pull cord. The boat was fully provisioned up and I motored out to the mooring where I was about use the generator and my electric hookah dive setup to do a quick clean of the hull before catching a favoring current to start the cruise. I grabbed the pull cord and it suddenly broke.

Oh well, I thought no problem I've already got the replacement cord. I had the service manual for the generator which involved taking the covers off and removing the fuel tank to get access to the recoil starter to replace the pull cord. Not too involved I'd just depart a little later than planned or wait until tomorrow. The problem was because the Honda had been so reliable for the past five years I never had any reason to remove the covers before and because it was operating in a marine environment a number of the screws had seized up tightly.


I then spent two days trying to remove them using various methods from PB Blasterscrew extractors  and finally ended up drilling some of them out.


 I also used my Dremel Rotary Tool to  make slots in some of the screws turning some of the phillips head screws into slotted ones:


To make matters worse some of these screws were "special" items according to the service manual. Needless to say I did not start out on that cruise and am currently waiting for parts including some of the "special" screws to arrive.

CAPT. MIKES'S TIP:  If you are using a generator like the Honda 2000 or some other make on board. Take some time when you first get it to coat the cover screws with some of anti corrosion product like Tef-Gel .  It will save a lot of time and aggravation later.  One thing is for sure when I re install the screws each will get a nice coat of Tef-Gel  so in five years when I need to replace the pull cord again it will be a much easier and faster job.