Showing posts with label trouble shooting. Show all posts

Sunday, August 21, 2016

POSEIDON SPEAKS TO ME: Part Three

I called David at Annapolis Hybrid Marine the U.S. distributors for the Thoosa 9000 systems.  Since the Key switch did not seem to be the issue I began thinking of other things that might easily resolve the problem. One was to disconnect the B+ of the battery to hopefully reset the controller. David said that was not necessary. I then mentioned that the power contactor relay might be bad. David ask if I had a multimeter on board. Of course I did. He suggested I remove the cover to the controller box and he could guide me on making some voltage measurements. This of course means emptying out the starboard locker and squeezing my way to large frame down below in the summer heat to access the controller box. I had not had to do this in eight years of electric propulsion operation because the system was so reliable. But, now it had to be done. I then asked a question that saved me some aggravation. In preparation of my journey down below I asked how many screws hold the cover of the controller box and are they Phillips? David replied no they are Torx (star) type screws. I did not have any Tork screwdrivers on board so I would need to buy them. But, at least I had not found this out after contorting my body down below after emptying out the locker. So it was a row back to land to get a Torx screw driver set to continue trouble shooting.


At the store I had several choices of Tork tools. The first one I picked up was a compact set that folding into the handle. It looked like it would do the trick. Though something told me that maybe I had better have a backup.


So I also bought another Torx set that had a screwdriver type handle with interchangeable bits. 
 Good thing I did this because I found that with the compact folding set it was difficult to access and turn the screws at the rear of the case. Where as the set with the screw driver handle was much more secure and made it easy to turn the screw. But, even then I found the controller box was just a little too close to the battery charger case to use the handle.  I was however able to use just the Torx  bit and a pair of small vice grips to turn the screw enough to remove it.


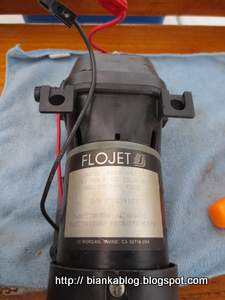
With the controller case finally removed I gave David another call and armed with a digital multimeter I was able to start trouble shooting.  There is not much to a Thoosa 9000 system. There is of course the battery bank, motor, key switch and a box holding the controller and a few other components.
But, even inside the controller box there are many components that one finds with a diesel engine system. There is a relay, fuses, connectors. The one main different component is the motor controller. In my case it is a Navitas 400 unit. Under Davids guidance I carefully connected the multimeter ground to the B- battery connection in the box. I then checked the voltage at the power relay connections. Which was the component I thought was the next culprit after elimination the key switch. I measured 55 volts which was full battery voltage on both terminals.  David explained that it looked like the the relay was good because 55 volts on both terminals means the coil of the relay is not open. What happens on turn on is after the Controller does it's self check it grounds one side of the relay which then allows full battery power to the controller. This was not happening. So it was time to look at the controller. There were two status/fault lights on one side of the controller neither one was on. David then instructed me to probe two pins on the multipin connector  to the controller module.  There was 55 volts across those pins. This meant the controller module was getting power. So the diagnosis is the controller is bad. David mention this had happened to other units and as a result they were no longer using the Navitas controllers because of these mysterious sudden failures. Stil I had gotten eight trouble free years out of this one and could easily replace it but, I was thinking it might be best to upgrade to the new controller David mentioned. Trouble is the new controller is larger and won't fit in to the current box. He said I also needed to check if the new slightly larger box dimensions would fit in the current space. I'm pretty sure they would but, I want to make sure and while I'm at it I want to mount it so I will be able to have enough roof to use the Torx screwdriver handle to remove the cover in the future.

 So a quick ten minutes of probing and the problem was quickly diagnosed. Compared to the hours I and some diesel mechanics I had hired in the past spent scratching our heads working on the diesel it was a breeze. Unfortunately, it is getting late in the season and I would be away for several weeks. So I had a few things to think about before I decide to move ahead with a new controller box which I'll share in an upcoming post.

Tuesday, September 03, 2013

PUMP IT UP: Repairing a FloJet 4300 Series Washdown Pump Part One

Pump it up until you can feel it.
Pump it up when you don't really need it.
 Elvis Costello

At the end of last season I discovered two of the four electric pumps on board BIANKA did not work. They both were feed from the same circuit breaker but, do not operate at the same time. One was the Wash Down pump used to clean the anchor chain after it's been laying on mucky bottoms. The other was the Macerator pump that is used usually once a year on haul out after I rinse out the holding tank. Neither one would power up. Sounded to me like a power issue since both pumps were fed from the same circuit. Having two pumps fail at the same time seemed against the odds. Sounded to to be an easy fix. Most likely a power issue.  First I measured the voltage from the circuit breaker panel it read the nominal 12 volts. Well, then gotta be the switch that switches between which of the pumps will be energized. But, when I checked the switch it was good. Oh well. Looks like both pumps did fail at the same time. Since one pump was for the wash down and used every time I hoist the anchor and the other pump was for the macerator and really only used one time each year when cleaning and winterizing the holding tank for storage. I decide the wash down pump was the priority.

The wash down pump is a Flojet 4300 series pump. A 4305-143 to be precise and had been on the boat since I bought her in 1995. It had worked well until now. The pump is located in behind a panel the head area along with the pressure water pump and the shower sump pump:


Pretty easy to get to unlike the macerator pump which is buried under some cabinetry and hoses. Though because all the wiring was connected with crimped splices I had to cut the wires to remove the pump from the cabinet. But, I decided to rewire the pump with Anderson Powerpole connectors to make future removal of the pump and trouble shooting easier.

After removing the pump I looked for anything obvious that might have caused the failure:

Not seeing anything suspicious I followed red 12 volt lead that went into a small module on the pump and exited out the other side and connected to the motor. The is the pressure switch that shuts off the pump when the pressure reaches a certain level. Taking the cover off of this module exposed it's connections:
Nothing unusual but, I did notice a little melting and discoloration of the wire and some melting on the housing of the switch:


Well this certainly was worth investigating. The connections to the wires looked good but, when I took out my meter and measured across them I found a high resistance across the leads:

I measured 4 meg ohms not a totally open circuit but, high enough to prevent the pump  from operating. I decided to first remove the spade connectors clean the contacts to see if that improved the readings:


Having done that I still measured a high resistance. So I decided to remove the pressure switch module from the body of the pump:


I had no parts diagram of this part of the pump so I could not be sure how things were supposed to look. But, when I went back and measured across the leads of the pressure switch I read about three ohms so that seemed to be normal. I put the pressure switch module back on to the pump and reinstalled the pump back into the locker. After connecting the wash down hose I applied power and the pump began gushing out water. Ah, fixed I thought. I shut down the power put a nozzle onto the hose and fired up the pump again. I could hear the pump as it pressurized the hose and then shutdown like it should. But after opening the nozzle and relieving the pressure the pump still  failed to turn on.  So it looks like I'll need to do a little more troubleshooting but, before I do I will get a replacement pressure switch. Since that looks like where the problem is. Though the documentation shows there is not such part. It looks like I may need to order a whole upper housing. I'll be making a call into FloJet customer service to see if this is the case before I continue.

FOR  PART TWO OF THE PUMP REPAIR CLICK HERE


Saturday, May 05, 2012

BATTERY INVESTIGATION PART 8: LOAD TESTING

After charging up the battery bank and then disconnecting the batteries I let them rest over night. I came back on board the next day and measured each battery's voltage and did two tests on each battery  using the Centech Battery Analyzer  and a 100 Amp Battery Load Tester.


Here's a quick video showing how to use the Centech Analyzer:


Here is the data I got from the Centech battery analyzer testing

                                      VOLTS   mOHM  CCA     BAT CAPACITY
BATTERY 1                   12.94      2.39      1235          100%
BATTERY 2                   12.45      2.33      1265          100%
BATTERY 3                   12.92      2.35      1241          100%
BATTERY 4 (suspect)   12.92      2.48      1179          100%

All batteries have passed the test from the analyzer. Though battery 4 (the lowest battery in the string) is certainly has a slightly diminished CCA (Cold Cranking Amps) reading compared to some of the others. But, it still passed the tests. The parasitic load from the Paktrakr that was on this battery for four years seems to have weakened it a little. It also has a slightly higher milliohm resistance reading compared to the other batteries not much more though. This might be due to some sulfation internal to the battery because of the parasitic load.

I followed the Centech battery analyzer test with the  100 Amp Battery Load Tester. All batteries passed that load test too:


Obviously, I will be keeping an eye on battery four which when I started this investigation would not even complete a charge on two separate battery chargers. After those results some might have just thrown the battery away and replaced it. But, as you can see it did manage to redeem it's self over time once the parasitic drain was removed. Why all of a sudden did I have this problem after four years? The only thing different this year is that I did not have my 48 volt Air X wind turbine also providing additional charging over the winter layup. This made the solar panels the only charging source and it may have not been enough considering the constant parascitic load on the fourth battery. I also added an additional device to monitor the charging of the battery bank. This additional load may have been enough to add additional sulfation to the suspect battery. So the lesson learned for this electric sailor is to keep parasitic loads off any one battery in the string. Another good thing from this investigation is I now have data to see how each individual battery the 48 volt propulsion bank ages from here on.

Wednesday, April 25, 2012

BATTERY INVESTIGATION PART 7: Much better balance

Well, it's been another two weeks since I was on board looking at the issue with the last battery in the string. When I last was on the boat I had charged up the bank fully and removed the Paktraker battery monitor which had been taking it's power from the suspect low battery. So for two weeks only the solar panels had been keeping the bank topped up and there were no parasitic loads off of any individual battery. When I powered up the Dual Pro PS4 battery charger this is what happened:


As you can see within a few seconds all four batteries immediately jumped up into the 90 to 100% range. This seems to indicate that all the batteries are pretty close in balance to one another.  It certainly is much improved situation  from the last time I fired up the charger which you can see here:


This time after an hour of charging all the batteries were fully charged within seconds of each other. The bank has come along way since I first discovered that the low battery in the bank was not able to accept a full charge.   I'm glad I took the time to investigate the reason for that battery's failure to charge fully. It seems to be related to the Paktraker's parasitic load off the suspect battery. Since I removed it from the battery there has been much improvement. The suspect battery has gradually over several weeks has come to be comparable charge wise to the other batteries in the bank. Now it is on par with the other three batteries in terms of charging.  The only thing left to do is to do one final charge and let the bank rest and then load test each battery.  I'll be doing that very shortly.