Sunday, September 29, 2013

PUMP IT UP: Repairing a FloJet 4300 Series Washdown Pump. Part Two

After diagnosing the problem with BIANKA's FloJet washdown pump and losing and then finding the replacement pressure switch. I was finally able to start the repair. The first issue to surface was to find which replacement pressure switch kit to use as there are several available. I contacted FloJet customer service who requested the model number and serial number for my pump. It turns out I need the  Flojet 02090118 40 PSI Pump Switch Kit for my model 4305-143 FloJet pump. Included with the replacement pump kit is a list of FloJet models and there replacement switch part numbers:

My FloJet pump has been on the boat since I bought it in 1995 and probably longer perhaps as far back as 1986. In the time since FloJet has changed the design of the pressure switch and as a result there are less parts involved and some that are eliminated altogether. The instructions show which parts need to be removed and how to install the new ones:

Here is what my pumped looked like after I removed the old pressure switch and the parts I would be discarding:


Here is what comes with the new replacement pressure switch kit:


Much less parts to deal with than the old pump. There are three pump diaphragms that come with the new kit:


As explained in the instructions which one you use depends on the liquid that will be flowing through the pump. They are labeled V, B and E. Which stand for Viton, Buna and EPDM. For potable water and seawater the instructions say to use the diaphragm labeled E for EPDM. There are some subtle changes in the replacement diaphragms too.  Here is a new Buna diaphragm on the right compared to the old diaphragm removed from the pump on the left. Notice that the lip on the new diaphragm is a little different. So it is best to discard the old one and not keep it around as a spare:

Here is the new EPDM diaphragm installed on the pump:

The new  Flojet 02090118 40 PSI Pump Switch  comes with black wires attached:


I swapped them with the red wires (also included in the replacement kit) since the switch will be switch the + 12 volt voltage:

Once the EPDM diaphragm was installed on the pump body one carefully aligns the switch module so that the diaphragm is not pinched  and screw holes are aligned and screws one screw snug and then the other to about 9-10 inch pounds. I just snugged them by feel and had no leaks.

In addition to replacing the switch I also took the opportunity to add Anderson Powerpole connector to the pump and switch wires. This will make it easier to troubleshoot the switch or even by pass the switch completely:

With the new pressure switch installed and Powerpole connectors installed the pump is ready to be reinstalled:


I was curious about the defective pressure switch. I had to cut the plastic off of the switch area and took a look at it after it was removed and it was a little more complicated than I imagined:

There are springs and two contacts that connect to each of the terminals. The failure of the switch seemed to be a combination of corrosion and bad contacts. Still it lasted eighteen plus years without a problem. Hopefully the replacement will last just as long.


Thursday, September 26, 2013

ANOTHER GEORGE ORWELL MOMENT ON BOARD


I had a frustrating few days on board recently. I ordered the new pressure switch for the boats washdown pump and it arrived in two days. I bought it to the boat and put it aside. When it came time to attempt the repair I could not find it. Then I had a sinking feeling that perhaps I had thrown the box with the part out with another empty box. I went through the trash bins at the boatyard and found the other box but, not the one with the pump part. I swore I threw out two boxes. Did someone see it and take it? Still not finding it on board despite looking everywhere from the cabin sole to the lockers. I finally gave up and ordered another forty dollar pressure switch kit. It arrived and I bought it on the boat determined not to lose like I did the last one. The next morning just after I woke up I noticed the box containing the original pressure switch was sitting on top of another box right under the table in the main cabin. Though I looked all over the cabin I never noticed it sitting on top of the empty inverter box. It was also no more than three inches from my knee when I was having dinner or using my laptop. As George Orwell said:

"To see what is in front of one's nose needs a constant struggle." 

.

Tuesday, September 24, 2013

RETHINKING PROPANE: Energy Savings

I was thinking about my plan to stop using propane on board fed from a central propane tank and just use smaller individual burners using either propane and/or butane canisters as fuel. This plan has worked out well this season. Then I thought in addition to not having to repair the corroded pipe and burners on the stove. I no longer need to use the propane solenoid propane valve that use to feed the propane into the old propane hose for distribution inside the boat. I wonder how many amps that used? So I took out  my Extech MA220 Compact Clamp Meter and measured it:

It was a little over an amp. While not a super heavy draw if left on it does add up especially if you have a weak house bank. So there is some additional energy savings to adopting my new propane plan. That's a good thing.

Saturday, September 21, 2013

NOTES OF AN ELECTRIC SAILOR: Late summer cruise 2013


I decided to head out on a late summer/early fall cruise yesterday. Before I did I topped up the 48 volt propulsion bank for the Thoosa 9000 system using the Honda 2000i generator at the mooring. In the morning I used the helm instrumentation panel to read the battery voltages here were the readings:

BATTERY 1   13.3 VOLTS
BATTERY 2   13.1 VOLTS
BATTERY 3   13.1 VOLTS
BATTERY 4   12.8 VOLTS 

PACK VOLTAGE 53.2 VOLTS

I left later than I had planned and so had to buck some current while heading out of the harbor. Once I got out to open water I found the winds were light to nonexistent for most of the day. So I motor sailed for most of the eight hours in the light breeze drawing currents from 5 amps to 25 amps. After a trip of 18 miles I picked up a mooring in a nearby harbor and took the following readings of the batteries on the instrumentation panel:

BATTERY 1   12.6 VOLTS
BATTERY 2   12.5 VOLTS
BATTERY 3   12.4 VOLTS
BATTERY 4   12.4 VOLTS

PACK VOLTAGE 50.7 VOLTS 

The percent charge as read on the Xantrex XBM battery monitor showed a reading of 83%. I fired up the Honda 2000i generator using the 900 watt ZIVAN NG-1 battery charger until it reached the second stage of charging. I then switched to the Dual Pro 4 charger which topped up each battery individually until fully charged. It took three and a half hours to fully recharge the propulsion bank. During which time I also charged the battery for the 12 volt house bank and the Electric Paddle outboard.


BLOG UPDATE:  I was relaxing in the cockpit enjoying a glass of wine when I suddenly realized that I never took the Amp Hour readings off of the XBM battery monitor after I finished the sail. After six years I guess I'm just too comfortable with the electric propulsion system to keep an eye on all the parameters. :)  Perhaps I'll remember next time.

SUNRISE OF SUMMER

I awoke early in time to catch the last full day of summer's sunrise:


Tuesday, September 17, 2013

SUNSET BLUES

I took the dingy to shore and went and picked up some mussels. Another cold front blew through yesterday and the chilly northwest wind made me want to cook up a steaming bowl of Mussels Posillipo for dinner. Though summer still has a few more days left on the calender the chilly northwest wind and the fact the sun was setting before 7 PM had made me a a little sad. I know that soon it will be time to pull the boat for the winter. But, as I tied the dingy to the stern just as the sun set I heard the unmistakable splashes of a school of Bluefish:

Ironically, the local fishermen who often patrol the harbor gazing around the mooring field looking for these powerful fish were no where to be seen. The chilly winds had seem to keep them nice and cozy on shore. Only I was there to witness their return to the harbor in such large numbers. Even in the fading light I could see the silvery flash of their sides just below the surface. I watched them for a few minutes. Which made me think about pulling  John Hersey's book on the fish Blues  from BIANKA's bookshelf. But, then the chilly wind soon had me thinking of heading to galley and start cooking those mussels. Still it's nice to see the Bluefish back in the harbor even though it is one of those signs that means the sailing season will be ending here in the northeast in another month or so.

Sunday, September 15, 2013

A WINTER WATER VIEW

My girlfriend has decided that we will go on a winter vacation in a few months that includes staying on an over water bungalow that looks like this:

 I especially like the steps on the left that lead to the sea.

Tuesday, September 10, 2013

TOOLS OF A SAILOR: Cutting Star Board with an Oscillating Multifunction Tool

A while ago I purchased a cheap Chicago Electric Power Tools Oscillating Multifunction Power Tool. While I was cutting the pieces for the second phase of the Helm Instrumentation Project I decided to use it to cut some of the 1/2" Star Board pieces and it did a pretty good job. Some of the pieces were pretty long so there was a little melting of the Star Board requiring a quick second pass. But overall it worked well as you can see in this video:


Saturday, September 07, 2013

RETHINKING PROPANE ON BOARD: Plan B: Butane Burner

After discovering the severe corrosion on the gas feeder tube of BIANKA's factory installed stove and oven. I decided to look at other alternative burners for cooking. My first experiment was with a Coleman burner which worked out very well. Even though most of my cooking can be accommodated using just one burner. Having another burner available is a good idea. Having it it use an alternate fuel also seemed like a good idea. With that in mind I bought a Iwatani Butane Stove :

It has a smaller footprint than the coleman burner and also comes with a case that makes it easier for storage.  I've had a similar cheaper butane burner on board for years but, when I went to use it earlier this year the flame plate had fallen off making it useless. the Iwatani seems to be better built and I've seen reviews that said they were used in Japanese restaurants for Hot Pot dishes called Nabemono in Japan. So they must know a thing or two about building quality stoves. Though a lot of the stoves may look similar form the outside this Iwatani has an additional metal heat sink goes from the burner to the the butane container area:

This metal heat sink warms up the butane container slightly to prevent it from freezing and reducing gas flow to the burner while cooking.

Another nice thing about this burner is the butane canister fits inside the burner unlike the Coleman's externally mounted propane canister.

 So the foot print is somewhat smaller in the galley than the Coleman burner. But, the butane canister does not hold as much fuel as the Coleman either. Also the Iwatani does not have the raised  loops on the burner grill like the Coleman burner does so pots and pans can easily slide off if you are cooking underway and not paying attention.


I found that the butane canisters using this burner last me about a week where as the Coleman one pound propane canisters lasted two weeks. The butane canisters also have no way of being refilled. But, the Butane Fuel  can be purchased in bulk quantities to provide months of cooking time. Though some have said they are also often readily available in Asian grocery stores at very reasonable prices too.

CAPT MIKE'S USAGE NOTES: 
Though the Iwatani Butane Stove cooked just as well as the Coleman burner and takes up less space. I will probably make the Coleman the primary cooktop on board. The Propane canisters last longer and the burner has the loops that hold pots and pans more securely. But, I will keep the Iwatani unit on board with several canisters as a backup or as additional burner when needed. Also with it's carrying case it is easier to store and allows me to have a chance to find  an alternate fuel if the propane canisters can not be found when cruising. As a plan B backup it should work very well.


Tuesday, September 03, 2013

PUMP IT UP: Repairing a FloJet 4300 Series Washdown Pump Part One

Pump it up until you can feel it.
Pump it up when you don't really need it.
 Elvis Costello

At the end of last season I discovered two of the four electric pumps on board BIANKA did not work. They both were feed from the same circuit breaker but, do not operate at the same time. One was the Wash Down pump used to clean the anchor chain after it's been laying on mucky bottoms. The other was the Macerator pump that is used usually once a year on haul out after I rinse out the holding tank. Neither one would power up. Sounded to me like a power issue since both pumps were fed from the same circuit. Having two pumps fail at the same time seemed against the odds. Sounded to to be an easy fix. Most likely a power issue.  First I measured the voltage from the circuit breaker panel it read the nominal 12 volts. Well, then gotta be the switch that switches between which of the pumps will be energized. But, when I checked the switch it was good. Oh well. Looks like both pumps did fail at the same time. Since one pump was for the wash down and used every time I hoist the anchor and the other pump was for the macerator and really only used one time each year when cleaning and winterizing the holding tank for storage. I decide the wash down pump was the priority.

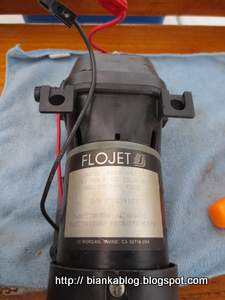
The wash down pump is a Flojet 4300 series pump. A 4305-143 to be precise and had been on the boat since I bought her in 1995. It had worked well until now. The pump is located in behind a panel the head area along with the pressure water pump and the shower sump pump:


Pretty easy to get to unlike the macerator pump which is buried under some cabinetry and hoses. Though because all the wiring was connected with crimped splices I had to cut the wires to remove the pump from the cabinet. But, I decided to rewire the pump with Anderson Powerpole connectors to make future removal of the pump and trouble shooting easier.

After removing the pump I looked for anything obvious that might have caused the failure:

Not seeing anything suspicious I followed red 12 volt lead that went into a small module on the pump and exited out the other side and connected to the motor. The is the pressure switch that shuts off the pump when the pressure reaches a certain level. Taking the cover off of this module exposed it's connections:
Nothing unusual but, I did notice a little melting and discoloration of the wire and some melting on the housing of the switch:


Well this certainly was worth investigating. The connections to the wires looked good but, when I took out my meter and measured across them I found a high resistance across the leads:

I measured 4 meg ohms not a totally open circuit but, high enough to prevent the pump  from operating. I decided to first remove the spade connectors clean the contacts to see if that improved the readings:


Having done that I still measured a high resistance. So I decided to remove the pressure switch module from the body of the pump:


I had no parts diagram of this part of the pump so I could not be sure how things were supposed to look. But, when I went back and measured across the leads of the pressure switch I read about three ohms so that seemed to be normal. I put the pressure switch module back on to the pump and reinstalled the pump back into the locker. After connecting the wash down hose I applied power and the pump began gushing out water. Ah, fixed I thought. I shut down the power put a nozzle onto the hose and fired up the pump again. I could hear the pump as it pressurized the hose and then shutdown like it should. But after opening the nozzle and relieving the pressure the pump still  failed to turn on.  So it looks like I'll need to do a little more troubleshooting but, before I do I will get a replacement pressure switch. Since that looks like where the problem is. Though the documentation shows there is not such part. It looks like I may need to order a whole upper housing. I'll be making a call into FloJet customer service to see if this is the case before I continue.

FOR  PART TWO OF THE PUMP REPAIR CLICK HERE